Modular office sofa: Buildable Lounge Systems by Bay and Power
You want a lounge that looks great, seats well, and powers the work. A Modular office sofa can do all three when you plan it “by bay and power.” That means you size each run by standard module widths, then place charging where people actually sit.
Most offices miss one of two things: the seat count feels off, or the outlets land across the walkway. Both problems are easy to fix with a simple bay plan and a short outlet schedule. Keep paths clear, bring power within arm’s reach, and use durable parts made for public spaces.
What Does “Plan by Bay and Power” Mean?
Consequently, it’s a two‑step method: size seating by repeatable module widths (bays), then schedule outlets at human reach for clean charging and IT. That keeps modular lounge seating, office lounge planning, and integrated power modules aligned as you reconfigure.
Compare Bay Modules To Common Seating Depths
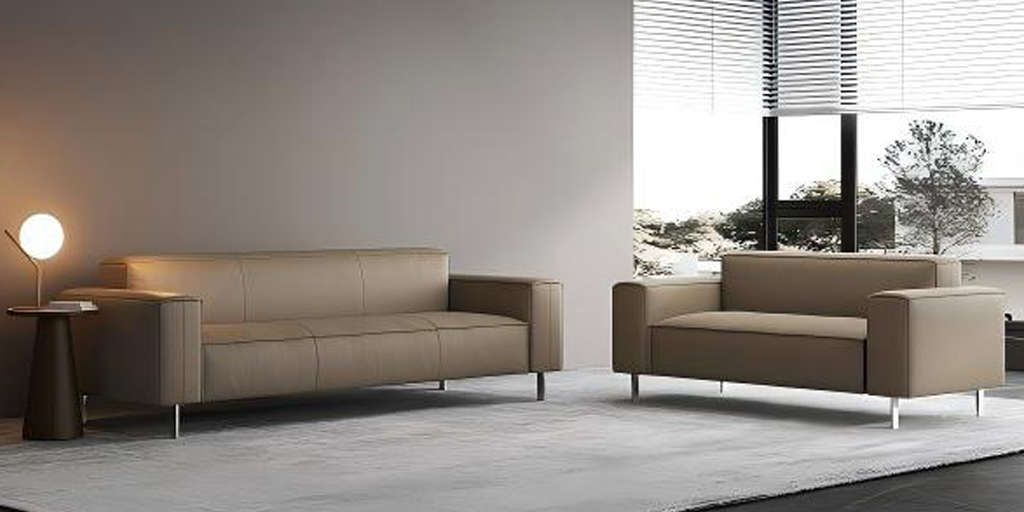
Furthermore, treat a “bay” as a width unit you can repeat and swap. Armless seats often run 24–30 inches wide; corners or arms need 28–36 inches. Depths near 28–34 inches fit most lounges without pushing knees into the aisle. In many rooms, three to five bays feel right for short stays; for longer sessions, insert a table bay so laptops and drinks live off the cushion edge. Finally, keep each segment swappable. When team size shifts, you can add or remove a bay without tearing up the whole plan.
Match Power Intervals To Seating Clusters
Specifically, aim for outlets within arm’s reach—about every two seats—so no one crosses a path with a cord. Use in‑furniture charging for day‑to‑day devices and add wall or floor power for higher loads. When bays grow long, repeat outlets in a simple pattern and mirror them across the run. That rhythm keeps routing predictable and makes changes easy later.
Verify Clearances Before You Lock The Layout
In practice, protect 36‑inch routes and keep 60‑inch turning circles where wheelchairs need to maneuver. Check door swings, column faces, and pinch points. Then, dry‑fit one full bay plus a table to watch real movement. If bags clip edges, trim a bay or add a screen to redirect traffic before you place power.
Which Modular Components Build Work‑Ready Lounges?
Moreover, mix armless seats, corners, wedges, tables, screens, and ottomans so you can reshape clusters in minutes. Keep reconfigurable seating simple and let power land where hands do the work. For evolving teams and flexible floor plans, start with a repeatable kit so every move still fits.
Select Core Pieces That Reconfigure Fast
On the other hand, avoid odd shapes that only work once. Standard armless seats stack into long runs, corners turn efficiently, and wedges aim sightlines toward displays. Pick feet or hidden gangers that connect without tools, and choose fabrics with high abrasion ratings so moves don’t scar the look. When you need growth, drop in another bay and keep the pattern steady.
Add Tables That Anchor Devices Safely
Then, use c‑tables for laptops and low occasional tables for shared kits. Tables can host charging while hiding cords under the edge. For video, place a fixed table bay at the camera side so devices sit steady and cords stay short. That small change lowers clutter and makes sharing simpler.
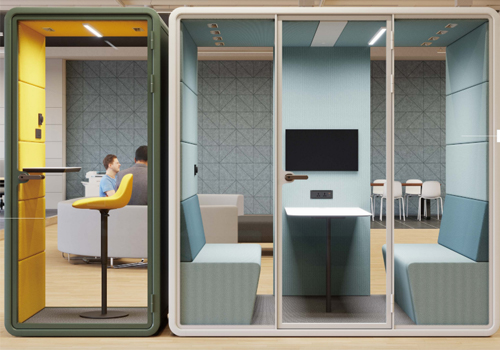
Use Screens To Shape Semi‑Private Nooks
Overall, high backs, movable screens, and acoustical panels calm noise and guide movement. Set screens around corner modules to form a nook without walls. When crowds spike, pull a screen aside and open capacity in seconds. That way, you tune privacy on the fly.
How Many Seats Fit Per Bay Size Safely?
Therefore, use bay width as your seat counter and protect routes first. Keep ADA clearance in mind as you add seats and tables per run.
Seat counts and clearances by bay
| Bay Size (Width) | Typical Depth | Seats per 8–10 ft Run | Aisle/Turn Targets |
| 24–26 in | 28–32 in | 3–4 seats | 36 in path; 60 in turn where needed |
| 27–30 in | 30–34 in | 4–5 seats | 36–42 in path near entries |
| Corner/Arm 28–36 in | 30–34 in | 2–3 plus table | Keep corners open for sightlines |
Which Power Options Fit Each Lounge Bay Best?
Namely, bring power to the user and keep cords off walkways. Pair in‑furniture charging with floor or surface feeds so outlets live where people work. Add floor box power where tables sit, and route slack with tidy cable management so nothing snags.
Place In‑Furniture Charging Where Hands Land
Notably, mount outlets on arms, fronts, or table edges so people plug in without twisting. Choose serviceable units with replaceable modules and tamper‑resistant doors. That keeps maintenance simple and uptime high.
Use Floor Boxes Away From Walls For Tables
In turn, position floor boxes under table edges in the middle of clusters, not at the perimeter. Short cords reduce trip risk and visual clutter. Seal covers well and keep them clean so lids shut flush after use.
Add Surface Raceways For Long, Quick Retrofits
Besides, when you can’t open the floor, use low‑profile surface or under‑carpet raceways to “walk” outlets to seats. Run paths parallel to seating edges and cross circulation at right angles in the shortest span possible.
What Codes And Standards Should You Check First?
Accordingly, confirm the big rules before you buy or install. These notes help you start the conversation with your electrician and facilities team, especially for NEC meeting rooms and furniture power. Also consider listing and durability marks like UL 962A furniture, power, and BIFMA X5.4 lounge seating.
Caption: Snapshot of code and standard touchpoints
| Scope | What It Covers | Planning Implication | Quick Note |
| NEC Meeting Rooms | Receptacle counts and placement | Plan floor outlets away from walls | Check the local adoption year |
| NEC Article 605 | Power in office furnishings | Use the listed furniture power units | Avoid daisy‑chains |
| UL 962A Furniture Power | Safety of FPDU units | Specify evaluated, serviceable modules | Match voltage and cord limits |
| ADA Routes/Turns | Clear widths and turning space | Keep 36‑in routes, 60‑in turns | Protect reach and knee space |
| BIFMA X5.4 Lounge Seating | Durability for public lounge use | Choose contract‑grade components | Test for long service life |
How Do You Place Outlets To Prevent Trips?
Also, put outlets where hands reach, not across the aisle. Keep cords short, group devices near tables, and align power with seating edges. When events add loads, use listed portable taps and avoid multi‑strip daisy‑chains. For outdoor spillover, choose weather‑rated boxes and protect routes.
- Set devices where people work. Place charging at seats and tables, not on far walls.
- Keep cords short and obvious. Route slack under table lips or seat bases.
- Mark one path per cluster. Guide movement to a visible, safe lane.
- Protect pinch points. Trim a bay or add a screen if bags snag edges.
- Test after changes. Re‑check covers, GFCI/AFCI where required, and labeling.
How Do You Control Noise And Add Privacy?
Besides, shape sound with form and fabric, then space clusters so speech fades before the next group. Add a rug, a screen wing, or high‑back segments to damp reflections. For calls and quick focus, place a couple of acoustic privacy booths near loud zones so people have options without leaving the floor.
Aim Sound With Shapes And Surfaces
Therefore, rotate wedges or corners so talk faces absorptive surfaces and away from circulation. A small angle change improves privacy while keeping sightlines to displays clear. Use screens to create a quiet side and a public side in the same cluster.
Tune Materials For Long, Quiet Service
Moreover, pick denser foams that resist bottoming out and textiles with high abrasion ratings. Softer surfaces cut clap and scrape noise during moves. Choose finishes that clean fast so upkeep doesn’t disturb adjacent teams.
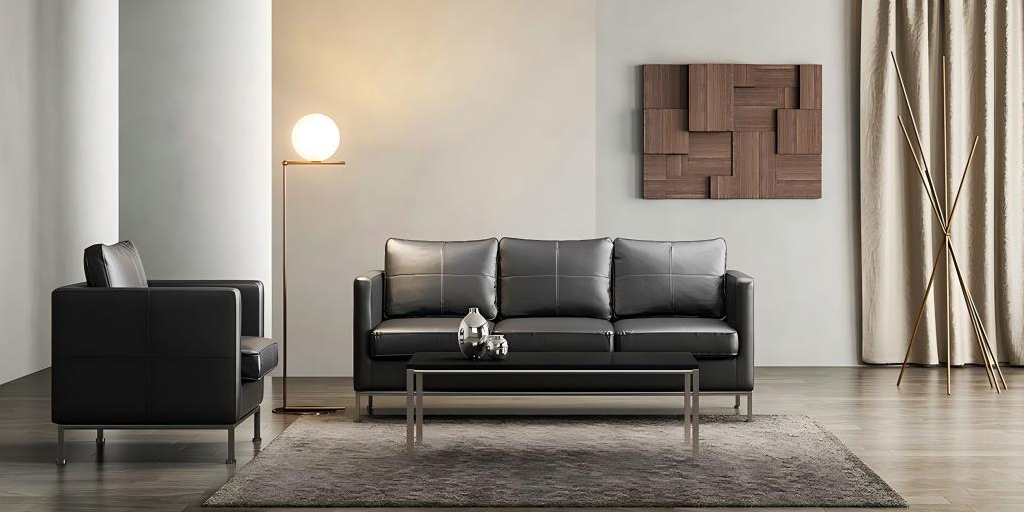
What Keeps Modular Sofas Durable At Work?
Overall, contract‑grade parts, serviceable power, and easy‑swap modules extend life and cut downtime. For heavy use, specify BIFMA X5.4 lounge seating rated frames and textiles with high abrasion counts.
- Choose contract frames. Use reinforced hardwood or metal frames built for public spaces.
- Pick strong textiles. Target high double‑rub counts and stain protection.
- Make parts swappable. Seats, backs, legs, and power should replace fast.
- Protect finishes. Use clean‑out gaps and bleach‑cleanable options where needed.
- Log service. Track repairs so you spot wear patterns early.
For a quick view of power‑ready lounge modules, see the curated overview at Onmuse Furniture.
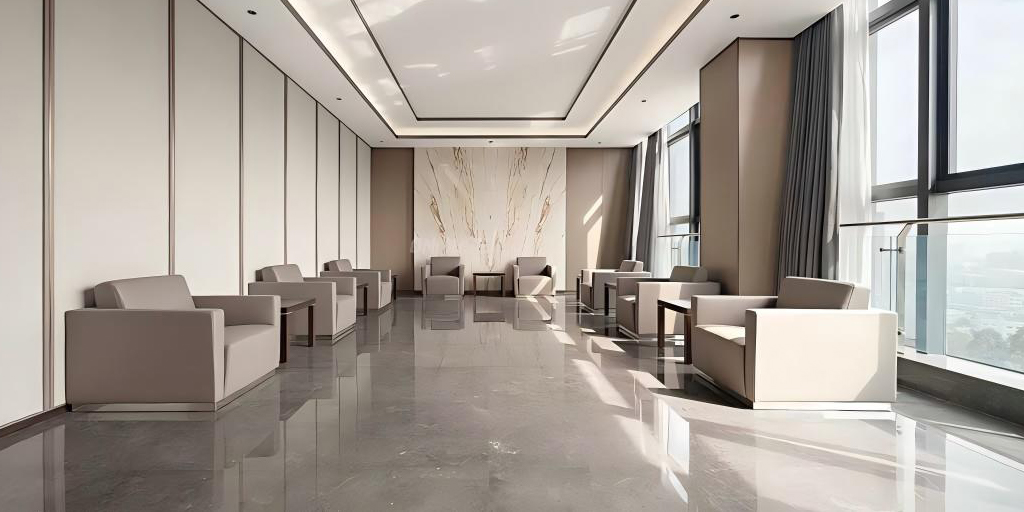
Where Does A Modular Office Sofa Work Best?
Notably, a Modular office sofa shines in “in‑between” zones: outside meeting rooms, near touchdown bars, or beside video walls. Place it by shared screens and keep outlets at each cluster so teams can sit, plug in, and move on.
Bridge Social Spots With Nearby Focus Points
In turn, seat islands near cafés or huddle rooms become natural dwell zones between meetings. Give each island a screenable side and a public side to balance vibe and privacy. That mix keeps flow smooth during busy times.
Place A Modular Office Sofa Near Collaboration Zones
Then, align runs to face displays and informal stand‑up areas. Mirror power every two seats so pairs can share without stretching cords. Keep one wider path on the approach side to ease traffic during changeovers.
How Do You Document, Test, And Maintain Lounges?
Overall, a light process keeps things safe and simple. Use a one‑page map, a quick‑scan checklist, and an evidence pack so service is fast and repeatable. This protects your plan and the devices people rely on.
- Five‑Minute Quick‑Scan: date checks → blocked paths → loose gangers → outlet cover condition → note any fees/costs for fixes → route to the right contact.
- Evidence Pack: photos of each cluster, outlet counts, load notes, bay map, timestamps, and a short summary.
- After Moves: re‑test outlets, verify GFCI/AFCI where required, tighten connectors, and update drawings.
- Label Updates: refresh outlet schedules and device tags after changes.
- Seasonal Loads: Confirm power plans before events and training days.
Can You Source Buildable Lounge Systems Here?
Accordingly, yes—review a buildable lounge approach with power‑ready modules and request a quick bay‑and‑power sketch. You can explore options or start a planning chat at the Onmuse Furniture homepage.
Choose A Bay Plan That Scales Fast
Overall, start with three armless bays and a table. Place outlets near the center and at one end. When needs grow, add a bay and repeat the pattern without touching the rest.
Ask For A One‑Page Outlet Schedule
Finally, document location, type (in‑furniture, floor, or raceway), and nearest seat count. That single page keeps installers, IT, and FMs aligned all the way through punch‑list.
Conclusion
In short, a bay map plus a short outlet schedule gives you a lounge that looks clean, seats well, and powers work. A Modular office sofa anchors the plan: you can add or subtract bays, slide screens, and repeat outlet patterns without a full redesign. Keep routes open, put charging at arm’s reach, and choose contract‑grade parts with listings that match your use. If you want a fast sanity check or a bay‑and‑power sketch, the team at onmusefurniture.com can help you build it right the first time.
FAQ
1. What bay width should I start with?
Aim for 24–30 inches per armless bay. Corners and arms often need 28–36 inches depending on profile and comfort.
2. How close should outlets be to seats?
Place power within arm’s reach, usually every two seats, so people do not cross aisles with cords. Mirror the pattern along the run.
3. Do I need special power in furniture?
Use furniture power units evaluated to UL 962A and follow NEC Article 605 rules for wiring in office furnishings.
4. What standards apply to durability?
Choose public/lounge pieces tested to BIFMA X5.4 and textiles with high abrasion ratings for long service life.
5. How do I prevent trip hazards during events?
Keep routes clear, shorten cords at tables, and use listed portable taps. Re‑check covers and labels after teardown.